


.JPG)


In the previous post PS2 Controller Outline, the pin configuration, specifications and working of different buttons of PS2 controller are explained. In this post we interface the controller with an Arduino development board and test a sample program. We seperate this into two sections; the hardware and software sections. The hardware section is pretty much straight forward which involves connecting controller wires to arduino pins. In the software section, we use the PS2X class in "PS2 controller Arduino Library v1.4" provided by billporter.
Hardware Section:
Out of 9 wires from the PS2 controller, we here use only 6 pins. They are Vcc(red), gnd(black), clock(blue), command(orange), attention(yellow), data(brown).

Hardware Section:
Out of 9 wires from the PS2 controller, we here use only 6 pins. They are Vcc(red), gnd(black), clock(blue), command(orange), attention(yellow), data(brown).

| PS2 Controller Pins | Arduino Pins |
|---|---|
| Vcc | 3V3 pin of on-board FTDI chip |
| gnd | digital ground pin |
| *clock | pin 13 |
| *command | pin 11 |
| *attention | pin 10 |
| **data | pin 12 |

* Note1: clk, cmd, att, data can be connected to any of the digital pins and program can be modified accordingly.
** Note2: The data pin should be connected as shown in the figure


Software Section:
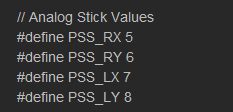
The library is available for download at billporter. In the PS2X class, all the button states are defined as constants as given below:

Some of the important functions defined are given below:
1. config_gamepad(clock,command,attention,data,Pressures?,Rumble?)
This function configures the PS2 controller and returns a corresponding result in byte format. The pins to which clk, cmd, att and data are connected should be entered in this function for initial setup. Pressure and Rumble are boolean values which can be enabled or disabled.
2. read_gamepad()
2. read_gamepad()
This function is called to get new values from the controller. This should be called atleast once in a second. It can also be used to set vibration strength of the vibrating motor.
3. Button(Button_Constant)
3. Button(Button_Constant)
This function returns a boolean value depending on whether a button is pressed or not. It takes a button constant as argument.
4. Analog(Button_Constant)
4. Analog(Button_Constant)
This function takes Button_Constant as argument and returns a byte which represents the analog value of the button (ie) the position in case of stick and the pressure with which the button is pressed in case of pressure button.
5. ButtonPressed(Button_Constant)
It returns a boolean value based on whether a button is just pressed or not.
6. ButtonReleased(Button_Constant)
6. ButtonReleased(Button_Constant)
It returns a boolean value based on whether a button is just released or not.
7. NewButtonState(Button_constant)
It returns a boolean value based on change in button state.
Sample Code:
Having discussed the software and hardware sections, lets now examine the example code given in the library itself. Click here to view the sketch "PS2X_Example".
ALGORITHM:
- Include PS2X_lib.h
- Create an instance for PS2X class
SETUP:
- Set baud rate
- Configure the game pad
- Identify the controller type
- Display results in Serial Monitor
LOOP:
- Read game pad ( read_gamepad( ) )
- Check all the button states
- If any button is pressed, display it in serial monitor
- If L1 or R1 is pressed, display the analog stick values in serial monitor
- Call a delay of 50 milliseconds.
Screenshot of serial monitor:


3 comments:
every thing works fine except the analog sticks, while i press them values are displayed on com screen but nothing happens when i rotate them!!!
can u tell me why the 10k resistor is connected b/w VCC and DATA??
mine not working with the same configuration
Post a Comment
தங்களது கருத்துக்களை இங்கே வெளியிடவும்...